

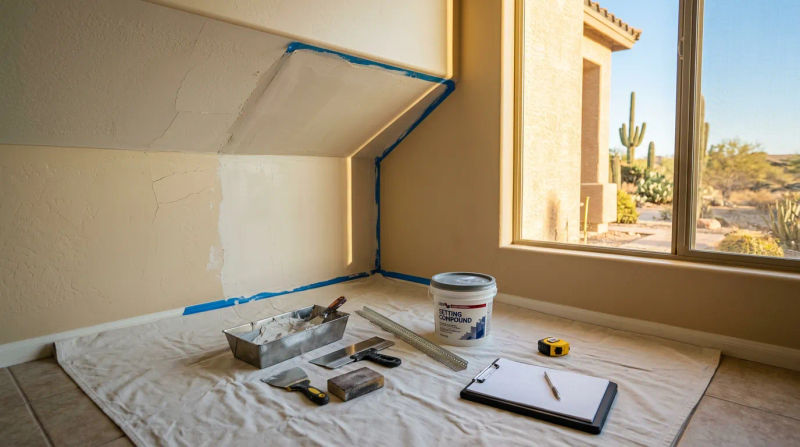
As a Senior Project Superintendent with over a decade of experience here in the Tucson area, I know that when a homeowner sees a crack, dent, or hole in their wall, the first question that comes to mind is almost always, “How much is this going to cost to fix?” It’s a practical question, and you deserve a straightforward answer. The truth is, the drywall repair cost can vary quite a bit. My goal here is to give you a transparent look at what goes into pricing these jobs so you can budget confidently and understand the value of a professional repair.
Average Costs in Marana
Let’s get right to the numbers. In Marana, the cost for professional drywall repair typically depends on the size, location, and complexity of the damage. For a simple, small-scale repair, you can expect a minimum service charge.
Here are some common price ranges you can expect for drywall repair cost Marana AZ:
- Small Patches (Nail pops, small holes up to 4 inches): For one or two minor repairs, you're often looking at a minimum service fee, which can range from $250 to $450. This covers the technician's travel, setup, and the multi-trip process required for applying compound, letting it dry, sanding, and texturing.
- Medium Patches (Holes from 4 to 16 inches): This is common for things like doorknob damage or small plumbing access holes. Expect to pay between $350 and $600. This price accounts for cutting a clean patch, installing backing if needed, and carefully blending the repair into the surrounding wall.
- Large Patches or Multiple Repairs: For larger sections of damage, or if you have multiple cracks and holes throughout the house, costs are typically calculated by the square foot or on a time-and-materials basis. This can range from $500 to $1,200+.
- Stress Cracks: When trying to figure out how much to fix drywall cracks in Marana, the answer depends on the cause. Simple hairline cracks from settling might be included in a small repair package. Larger, recurring cracks may require special tape and more extensive feathering, pushing the cost towards the $400 to $700 range.
- Ceiling Repairs: The ceiling drywall patch pricing is almost always higher than for walls. Gravity is not our friend here. It requires more time, specialized tools, and greater physical effort. A simple ceiling patch can start around $400 and go up significantly depending on the size and texture.
In many of Marana’s newer homes, we see minor settling that results in nail pops or those thin hairline cracks along corners and seams. While often not a structural concern, these cosmetic issues are best addressed by a professional to ensure they don’t reappear after you paint.
Factors That Affect Price
Two jobs that seem similar on the surface can have very different price tags. As a superintendent, my job is to account for all the variables that impact the timeline and final quality. Here’s what our trained crews consider when building an estimate:
- Size and Complexity of the Damage: A simple dent is a world away from a large, saturated section of drywall from a roof leak. Water damage often requires removing more material than is visibly stained to ensure all moisture and potential mold are gone, which increases the scope and cost.
- Location, Location, Location: A patch on a wall at eye level is the most straightforward. The same size patch on a 12-foot ceiling, in a tight stairwell, or behind a heavy appliance requires more prep, specialized ladders or scaffolding, and significantly more labor time.
- Texture Matching: This is where craftsmanship truly shows. Matching an existing texture - be it orange peel, knockdown, or a custom skip trowel - is an art form. It requires the right tools, the correct compound consistency, and an experienced hand to blend the new patch seamlessly with the old wall. A complex texture match will take more time and skill than a simple, smooth finish.
- Finishing and Priming: A standard repair includes taping, mudding, sanding, and texturing. However, priming is a crucial step to ensure the new paint doesn’t flash (appear different) on the patched area. Always clarify if priming is included in your quote. A full Level 5 smooth finish, which requires skim-coating the entire wall for a flawless look, is a premium service with a higher cost.
- Seasonal Conditions: Here in Southern Arizona, the environment plays a role. During dry months like September, joint compound can dry very quickly. This is great for speeding up the process but leaves less room for error. Our crews have to work efficiently to tool and blend the mud before it sets to avoid visible edges or imperfections.
How to Get the Best Value
Getting a good price doesn’t mean cutting corners. It means being smart about how you approach the project.
- Bundle Your Repairs: If you have a nail pop in the hallway, a small crack in the bedroom, and a ding in the garage, have them all fixed in one visit. Most of the cost is in the setup and travel time; adding a few small repairs to the list is far more economical than scheduling separate service calls.
- Prepare the Work Area: You can help reduce labor time by moving furniture away from the wall, taking down pictures, and covering anything you want to protect. While our crews always use plastic and drop cloths, having the area clear when we arrive allows us to get straight to work.
- Get a Detailed, Itemized Quote: A professional contractor should provide a clear quote that breaks down the work. It should specify the exact repairs, the materials to be used, the texture to be matched, and whether priming is included. This prevents surprises later on.
Questions to Ask Your Contractor
Before you hire anyone, arm yourself with the right questions. This helps you vet their professionalism and ensure you’re getting a quality, long-lasting repair.
- Are you licensed, bonded, and insured? This is non-negotiable. It protects you, your home, and the workers.
- How will you contain dust and protect my home? A professional crew will have a clear plan for dust mitigation, including using plastic barriers and cleaning up thoroughly after the job is done.
- Is texture matching and priming included in this price? Don't assume. Get confirmation in writing to avoid an unfinished-looking patch.
- What is your process for ensuring a seamless blend? Ask them how they feather out the edges and match the texture. Their answer will reveal their level of experience.
- Who will be performing the work? Ask if they use their own trained employees or subcontractors. Consistent quality often comes from in-house teams who follow standardized processes.
From my years on site, I can tell you that a proper drywall repair is invisible once it's painted. It doesn't crack, shrink, or show its edges. Achieving that result requires a methodical process and a commitment to quality that goes beyond just slapping some spackle on a hole. Investing in a professional repair saves you the headache of having to fix it again in a year.
If you're dealing with drywall damage, I hope this guide has given you a clearer picture of the costs and processes involved. For a personalized, itemized estimate in the Marana area, contact Ko Construction for a free consultation. We’re happy to take a look and provide a detailed plan for your repair.